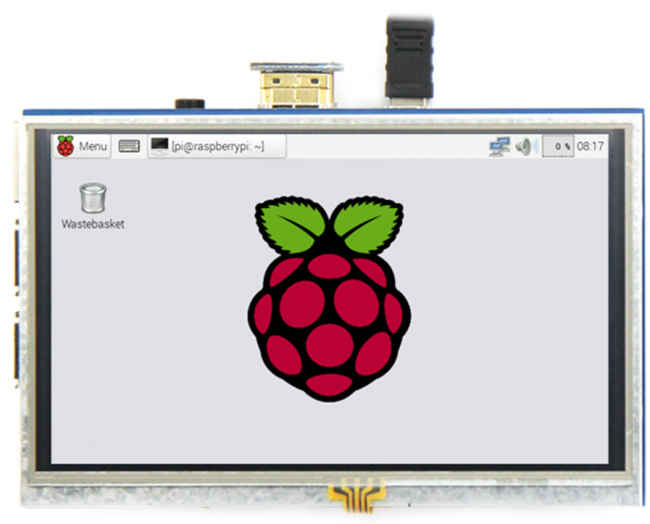
5inch HDMI Display

From LCD wiki
Revision as of 10:13, 29 May 2018 by Liang (talk | contribs)
Jump to: navigation, search


语言选择

Languages

➤中文
➤EN


product picture

MPI5008-66.png
MPI5008-11.jpg

Product description

  •  5’’ standard display, 800 × 480 resolution
  •  With resistive touch screen, support touch control
  •  support backlight control alone, the backlight can be turned off to save power
  •  supports standard HDMI interface input, compatible with and can be directly inserted with Raspberry Pi (3rd, 2nd, and 1st generation)
  •  can be used as general-purpose-use HDMI monitor, for example: connect with a computer HDMI as the sub-display (resolution need to be able to force output for 800 x480)
  •  used as a raspberry pie display that supports Raspbian, Ubuntu, Kodi, win10 IOT(resistive touch)
  •  work as a PC monitor, support XP,win7, win8, win10 system(do not support touch)
  •  CE, RoHS certification


Product Parameters

  •  Size: 5.0(inch)
  •  SKU: MPI5008
  •  Resolution: 800×480(dots)
  •  Touch: 4-wire resistive touch
  •  Dimensions: 121.11*77.93(mm)
  •  Weight: 175(g)


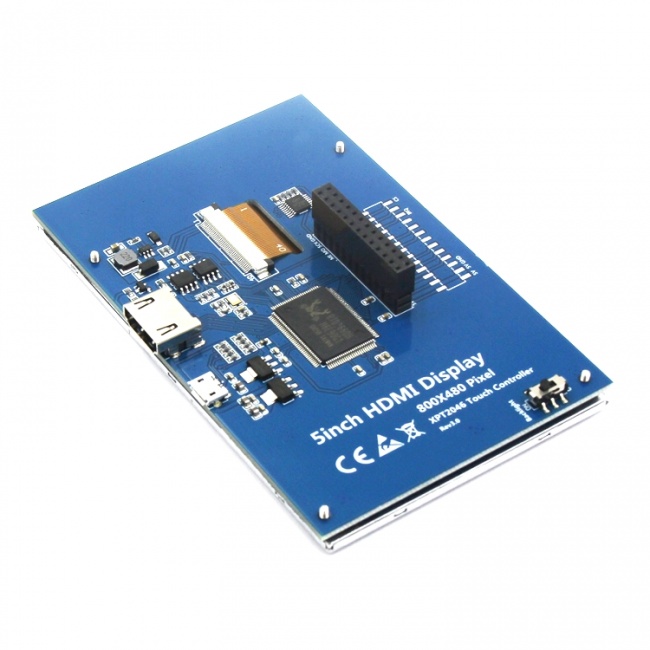
Hardware Description

524x524像素
① USB 供电接口:USB供电输入(5V),如图④母座已连接树莓派取电,则此USB可不接
② HDMI 接口:用于连接主板和 LCD 显示屏进行HDMI传输
③ 背光开关:控制背光打开和关闭,可节省功耗
④ 电源和触摸接口:从树莓派取电给液晶屏,同时将触摸信号通过GPIO回传至树莓派
⑤ 扩展接口:将图④母座占用的GPIO口PIN对PIN引出,方便扩展使用


在树莓派Raspbian/Ubuntu Mate/Win10 IoT Core系统中使用

  • 步骤1,安装官方镜像
  1. 从官方下载最新镜像
  2. 按官方教程步骤安装好系统
  • 步骤2,安装LCD驱动

方法一:在线安装(树莓派需连接互联网)
1)用Putty连接登陆树莓派系统到用户命令行(初始用户名:pi 密码:raspberry)
2)执行以下命令(复制后在Putty窗口中单击鼠标右键即可粘贴):

git clone https://github.com/goodtft/LCD-show.git
chmod -R 755 LCD-show
cd LCD-show/
sudo ./LCD5-show

方法二:离线安装
1)从光盘中拷贝“LCD-show.tar.gz”驱动到树莓派 系统卡根目录下;
(推荐步骤1烧录完成后将驱动直接拷贝到Micro SD卡,或使用SFTP等办法远程拷贝)
2)执行以下操作命令解压安装驱动:

cd /boot
sudo tar zxvf LCD-show.tar.gz
cd LCD-show/
sudo ./LCD5-show


  • 步骤3,

将Micro SD卡插入树莓派,将HDMI线连接树莓派和LCD,将USB线连接树莓派的4个USB口任意一个,USB线另一端连接到LCD的USB口,然后给树莓派上电,如显示和触摸均正常则驱动成功(请使用足2A电源供电)。

如何作为电脑显示器使用

使用HDMI连接线将电脑HDMI输出信号连接至LCD的HDMI接口;
将MicroUSB连接线一端连接LCD的USB Touch接口(两个MicroUSB任意一个均可),另一端连接至电脑的USB端口。
如有多个显示器,请先拔掉其他显示器接口,将本LCD作为唯一显示器进行测试。
作为电脑显示器用,触摸功能将不可用。


如何旋转显示和触摸

文档/视频

驱动下载

镜像下载

如果你觉得前面步骤的修改配置、安装驱动都比较困难或者仍然显示异常,

请先使用我们预装好驱动的镜像,下载后解压并把镜像写入到Micro SD卡中。然后把卡插入树莓派就可以使用了。

常用软件


Question: Using the Raspberry Pi image provided by the CD/net disk, cannot use the LCD normally.

Answer:

  • Confirm that the hardware connection is correct and the contact is good.
  • Determine whether TF card is normal and whether the system is started normally.
  • The PWR lamp is always bright when the Raspberry Pi is started, and the ACT light is flashing.If you find both lights on,

it may be the TF card does not successfully burn the image file,or that the TF card is not in contact with the Raspberry Pi.

  • Recommend using 5V 2A power adapter to power the Raspberry Pi.
  • If you use a computer USB interface, you may not be able to activate the Raspberry Pi due to insufficient power supply.

Question: What is the reason for the LCD not displayed using the image provided by the Raspberry Pi official?

Answer:

  • LCD needs to be installed driver to display correctly, please refer to "How to install the LCD driver (En)" related documentation.
  • It is recommended to use the image file provided by us first to test. After the test is passed, use the image file of Raspberry Pi official and installed the driver.

Question: How to switch back to traditional monitor for display?

Answer:

  • Please refer to "How to install the LCD driver (En)" related instruction document, and use the following command:
    sudo ./LCD-hdmi
    

Question: Why the LCD works but flickers?

Answer:

  • This problem is likely due to insufficient power supply.
  • If you are using the Raspberry Pi, please use the power supply of 5V full 2A to power the Raspberry Pi,
and connect the Raspberry Pi and the LCD by the short USB cable we provided.
  • If it is used as a computer monitor, do not use poor quality USB cable or extension cord connection,
do not receive extend the USB port to get electricity, please use the USB cable we provided.

Question: Why the Raspberry Pi unable to work properly after updating the Raspbian system?

Answer:

  • The update needs to be done in the following manner, otherwise the image cannot run:
    sudo apt-mark hold raspberrypi-bootloader
    sudo apt-get update
    sudo apt-get upgrade
    

Question: Why the LCD is connected to the computer HDMI, but cannot be displayed normally?

Answer:

Make sure the HDMI interface of the computer can be output normally.

The computer only connects to the LCD as a display device, and does not connect to other monitors (unplug other monitors).

Connect the USB first, then the HDMI.

Try to restart your computer.

You must use the Windows operating system. 

Question: How to turn on the Bluetooth function on the Raspberry Pi?

Anwer:

  • Method 1: upgrade to the official latest image of the Raspberry Pi (the Bluetooth function has been turned on by default after 2016-05-27-raspbian-jessie);
  • Method 2: manually turn on Bluetooth.
    sudo apt-get install pi-bluetooth
    sudo apt-get install bluetooth bluez blueman 
    systemctl status bluetooth
    sudo systemctl start bluetooth
    sudo reboot 
    

Question: Why unable to display full screen or incomplete when using 5”, 5”-B, 7”-B, or 7”-C HDMI screen?

Answer:

  • Check if the HDMI is plugged in and output is normal.
  • Open the config.txt file in the TF card root directory to check the HDMI configuration.
  • 5", 5"-B and 7"-B 800*480 should be configured as follows:
    hdmi_group=2
    hdmi_mode=1
    hdmi_mode=87
    hdmi_cvt 800 480 60 6 0 0 0
    
  • 7"-C 1024*600 should be configured as follows:
    hdmi_group=2
    hdmi_mode=1
    hdmi_mode=87
    hdmi_cvt 1024 600 60 6 0 0 0
    

Tech Support:

Email: Lcdwiki@163.com

Dear Customers:

There might be a delay of several hours in handling your question, depending on the time difference between your location and ours.
Sincerely hoping your understanding!

Our working time:

08:00-18:00 (Monday to Saturday)