<//tabber>
Description=
Pictures
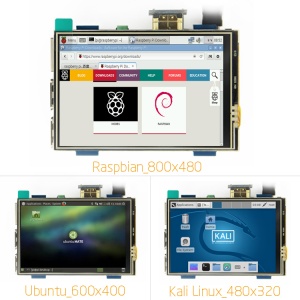
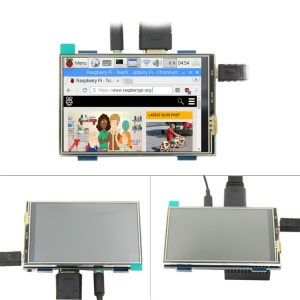
Description
- 3.5inch standard display, support HDMI input, refresh rate above 60FPS
- Physical resolution 480x320, configurable software resolution up to 1920x1080
- It is compatible with mainstream mini PC such as Raspberry Pi, BB Black, Banana Pi
- It can also be used as a general-purpose HDMI display, connecting computers, TV boxes, Microsoft Xbox360, SONY PS4, Nintendo Switch and so on
- Used as a Raspberry Pi display that supports Raspbian, Ubuntu, Kodi, Win10 IOT, single-touch, free drive
- Work as a PC monitor, support Win7, Win8, Win10 system (No touch Function)
- Support HDMI audio output,Backlight brightness can be adjusted
- CE, RoHS certification
Parameters
- Size:3.5(inch)
- SKU: MPI3508
- Physical resolution:480×320(dots)
- Software adjustable resolution:480×320~1920×1080(dots)
- Touch: resistance touch
- USB input power:DC5V 1A
- Power consumption:940mW (brightness @80%)
510mW (Backlight close)
- Dimensions:85.5*60.6(mm)
- Weight: 145(g)
Hardware Description
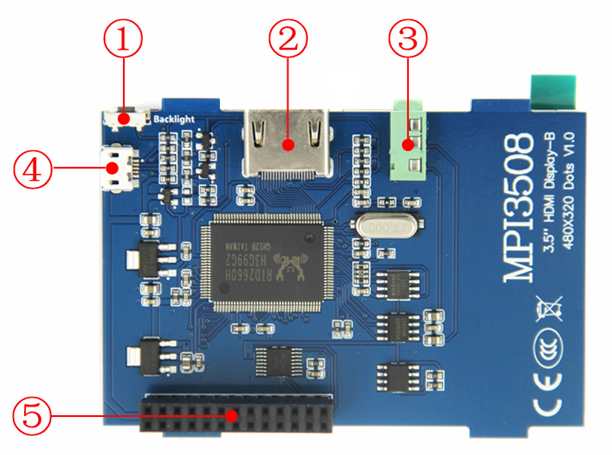
①Backlight button: backlight brightness adjustment button, short press backlight changes by 10%, long press 3 seconds to close backlight
②HDMI interface: HDMI signal input interface
③Amplifier interface: HDMI audio output interface
④USB power supply interface: provide power for ordinary display (5V 1A)
⑤Transaction raspberry pie 26PIN base: gets power and return touch from this area when used as a raspberry pie monitor
How to use with Raspbian/Ubuntu Mate System
方法一:快速安装(树莓派需连接互联网)
- 从官方下载最新镜像
- 按官方教程步骤安装好系统
- 步骤2,安装LCD驱动
1)用Putty连接登陆树莓派系统到用户命令行(初始用户名:pi 密码:raspberry)
2)执行以下命令(复制后在Putty窗口中单击鼠标右键即可粘贴):
git clone https://github.com/goodtft/LCD-show.git
chmod -R 755 LCD-show
cd LCD-show/
sudo ./MPI3508-show
- 执行完上述命令后,系统会自动重启,重启就能正常显示和触摸了
方法二:离线安装
- VideoService "youku" not recognized.
- 步骤1,安装Raspbian/Ubuntu官方镜像
- 1)从官方下载最新Raspbian或Ubuntu镜像 https://www.raspberrypi.org/downloads/
- 2)使用SDFormatter格式化TF卡,
- 3)使用Win32DiskImager把官方镜像烧录到TF卡。
- 步骤1烧写完成后,将光盘内Driver文件夹中的”LCD-show.tar.gz”拷贝到TF卡根目录,
- 打开TF卡根目录的config.txt文件并在文件末端加入以下代码,保存并安全弹出TF卡:
hdmi_force_hotplug=1
config_hdmi_boost=7
hdmi_drive=2
hdmi_force_hotplug=1
hdmi_group=2
hdmi_mode=87
hdmi_cvt 480 320 60 6 0 0 0
- 步骤3,将SD卡插入树莓派,按照图片所示连接硬件:
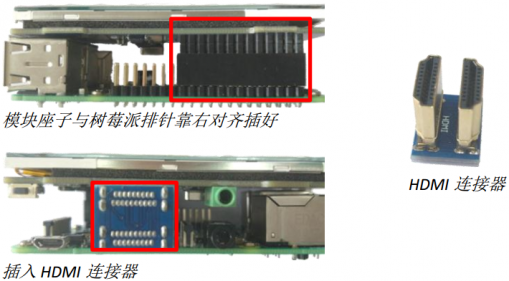
- 步骤4,给树莓派上电,接上鼠标键盘,打开树莓派上的terminal终端:
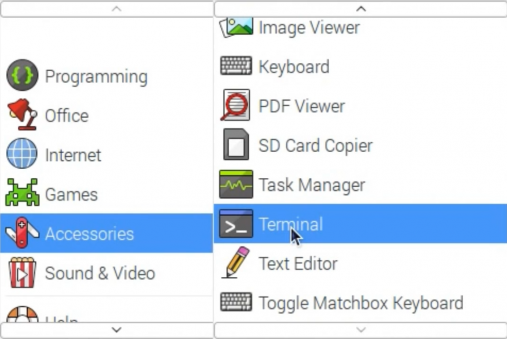
cd /boot
cp LCD-show.tar.gz ~
cd ~
sudo tar zxvf LCD-show.tar.gz
cd LCD-show/
sudo ./MPI3508-show
如何作为普通显示器使用
- 使用HDMI连接线将电脑HDMI输出信号连接至LCD的HDMI接口;
- 将Micro USB连接线一端连接LCD的USB供电接口,另一端连接至电脑的USB端口。
- 如有多个显示器,请先拔掉其他显示器接口,将本LCD作为唯一显示器进行测试。
- 注: 触摸功能只能接树莓派使用。
如何旋转显示和触摸
资源下载
- 如何安装LCD驱动(CN)
- 如何安装虚拟键盘(CN)
- 产品尺寸图:文件:MPI3508-07.PNG
- 本地下载:LCD-show.tar.gz
- 如果你觉得前面步骤的修改配置、安装驱动都比较困难或者仍然显示异常,请先使用我们预装好驱动的镜像,
- 下载后解压并把镜像写入到TF卡中。然后把卡插入树莓派就可以使用了。
- Panasonic SDFormatter
- Win32DiskImager
- PuTTY
BACK TO TOP
|-|
常见问答=
|
问题:使用光盘/网盘提供的树莓派镜像,无法正常使用LCD,怎么处理?
|
|
答复:
|
- 确定硬件连接无误且接触良好
- 确定Micro SD卡烧写正常,系统启动是否正常。
- 树莓派正常启动时PWR灯常亮,ACT灯闪烁。
- 如果发现两灯都常亮则可能是Micro SD卡烧写镜像不成功或Micro SD卡与树莓派接触不良。
- 推荐使用5V 2A电源适配器对树莓派进行供电。 如使用电脑USB接口供电,可能由于供电不足导致树莓派无法正常启动。
|
|
| 问题:使用树莓派官方提供的镜像, LCD无显示是什么原因?
|
|
答复:
|
- LCD需要安装驱动才能正确显示,具体请参考”如何安装LCD驱动”相关说明文档,
- 建议先使用我们提供的镜像,测试通过后,再自行安装驱动程序。
|
|
| 问题:装好驱动后如想切换回传统显示器进行显示,如何操作?
|
|
答复:
|
- 请参考”如何安装LCD驱动”相关说明文档,使用以下命令切换:
sudo ./LCD-hdmi
|
|
| 问题:使用7寸HDMI屏时显示正常但无触摸功能,如何处理?
|
|
答复:
|
- 检查触摸排线接插处是否运输松动
- 检查USB一端是否连接树莓派4个USB口中任意一个,另一端连接到液晶屏的USB Touch接口.
- 可先将USB触摸连接到电脑USB口,观察是否能正常被电脑识别并正常触摸,以此可以判断触摸功能好坏,
|
|
| 问题:5寸和7寸屏连接到电脑HDMI,无法正常显示,怎么解决?
|
|
答复:
|
- 确定电脑的HDMI接口可以正常输出
- 电脑只连接LCD作为显示设备,不连接其它的显示器(拔掉其他显示器)。
- 先接USB供电线再接HDMI线。
- 尝试重启电脑。
- 必须使用windows操作系统。
|
|
| 问题:使用5寸7寸HDMI屏时无法全屏或显示残缺,如何处理?
|
|
|-|
售后=
Tech Support:
Dear Customers:
There might be a delay of several hours in handling your question, depending on the time difference between your location and ours.
Sincerely hoping your understanding!
Our working time:
08:00-18:00 (Monday to Saturday)
</tabber>


