More actions
Setting method of Capacitive Touch Screen
The following is an example of 7inch HDMI Display-C capacitive touch screen:
1. According to the tutorial < How_to_use_Raspberry_Pi(Download,Format,Burn,SSH,PuTTy) >,Burn the latest official Raspbian system to the Micro SD Card, connect the 7inch HDMI Display-C to the first HDMI of the Pi4, and connect the computer monitor to the second HDMI.
2.Insert the Micro SD card, Raspberry Pi boot. You'll see that both displays work, but the content is different, and the 7inch HDMI display-c's touch is quite different.The reason is that the two screens are now extended to the right. If you want to use it only as an extended display, that's enough, but if you want touch to work, you have to go to the next step.
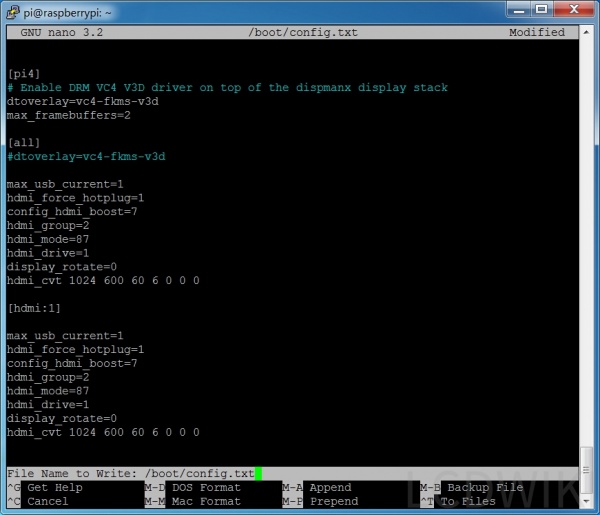
3.Execute the following command to open the config.txt file:
sudo nano /boot/config.txt
Add a statement at the end:
max_usb_current=1
hdmi_force_hotplug=1
config_hdmi_boost=7
hdmi_group=2
hdmi_mode=87
hdmi_drive=1
display_rotate=0
hdmi_cvt 1024 600 60 6 0 0 0

[hdmi:1]
max_usb_current=1
hdmi_force_hotplug=1
config_hdmi_boost=7
hdmi_group=2
hdmi_mode=87
hdmi_drive=1
display_rotate=0
hdmi_cvt 1024 600 60 6 0 0 0
(The two 1024 600 can also be changed to 1920 1080, 800 480 or other commonly used resolutions)
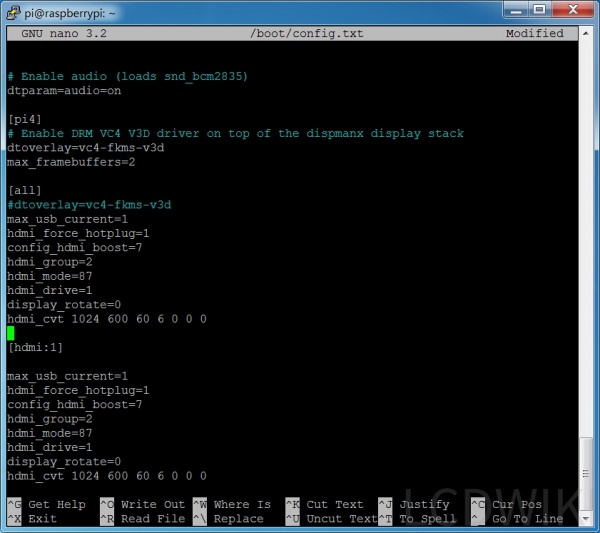
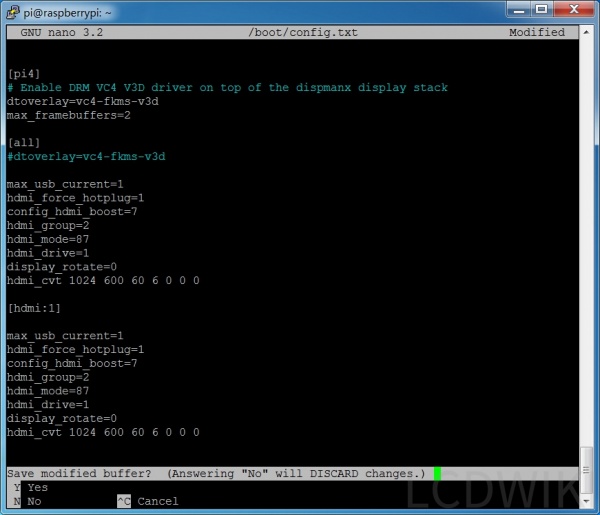
Press Ctrl+X to exit; Press Y again, save; Press Enter to save.
4.Execute the following command and the system will restart:
sudo reboot
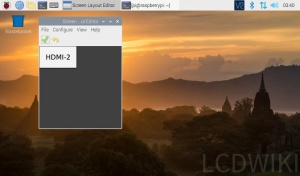
5.After rebooting, open Screen Configuration:
6.Drag HDMI-2 to coincide with HDMI-1 and click the green hook to confirm:
7.Two display screens can duplicate the same picture, and touch works well:
The setting method of Resistance Touch Screen
The following is an example of the 5inch HDMI Display of the resistive touch screen:
1. According to the tutorial < How_to_use_Raspberry_Pi(Download,Format,Burn,SSH,PuTTy) >, Burn the latest official Raspbian system to the Micro SD Card, connect the 5inch HDMI Display to the first HDMI of the Pi4, and connect the computer monitor to the second HDMI.
2. Insert the Micro SD card, Raspberry Pi boot. According to the tutorial < How to install the LCD driver >, install the 5inch HDMI Display driver.Once the driver is installed, you can see that both displays work, but the content is different and the touch of the 5inch HDMI Display is quite different.
3. Execute the following command to open the config.txt file:
sudo nano /boot/config.txt
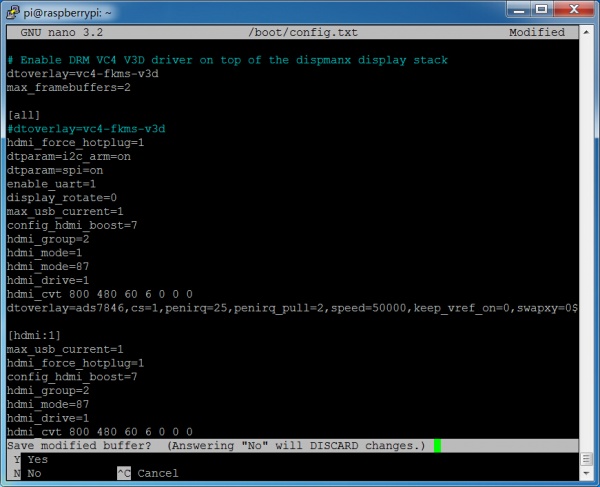
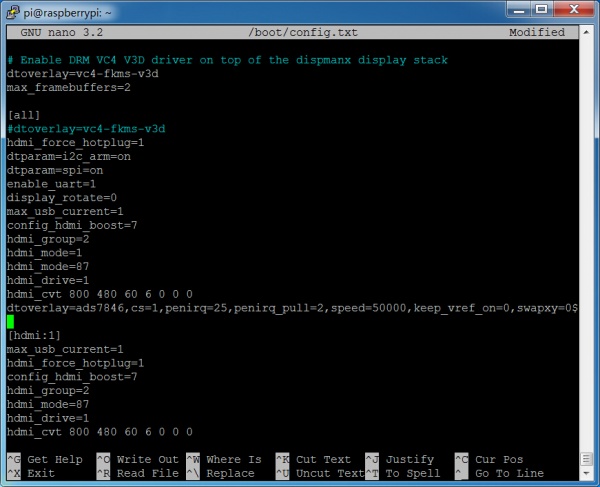
Add a statement at the end:
[hdmi:1]
max_usb_current=1
hdmi_force_hotplug=1
config_hdmi_boost=7
hdmi_group=2
hdmi_mode=87
hdmi_drive=1
hdmi_cvt 800 480 60 6 0 0 0
'
(The two 800 480 can also be changed to 1920 1080, 1024 600 or other commonly used resolutions)
Press Ctrl+X to exit;Press Y again, save;Press enter to save.
4.Execute the following command and the system will restart:
sudo reboot
The next 5, 6 and 7 steps are the same as the Capacitive Touch Screen above.
Notice:
1. These two sentences in config. txt are the key to Pi4 double screen display, must have:
dtoverlay=vc4-fkms-v3d
max_framebuffers=2
2. If you want to touch accurately, you can only copy the display, HDMI1 and HDMI2 overlap, and the resolution of the two screens is the same.

