Difference between revisions of "How to control the backlight brightness with PWM(7-B/7-C)"
| Line 20: | Line 20: | ||
</pre> | </pre> | ||
| − | (The value of <font color="red">'''X'''</font> should be between 0 and | + | (The value of <font color="red">'''X'''</font> should be between 0 and 1024, 0 brightest, 1024 darkest) |
<br><br><br> | <br><br><br> | ||
In Raspberry Pi 4B, you need to update the wiringPi GPIO library (Raspberry Pi needs to connect to the Internet): | In Raspberry Pi 4B, you need to update the wiringPi GPIO library (Raspberry Pi needs to connect to the Internet): | ||
| Line 37: | Line 37: | ||
</pre> | </pre> | ||
| − | (The value of <font color="red">'''X'''</font> should be between 0 and | + | (The value of <font color="red">'''X'''</font> should be between 0 and 1024, 0 brightest, 1024 darkest) |
Latest revision as of 11:21, 4 August 2020
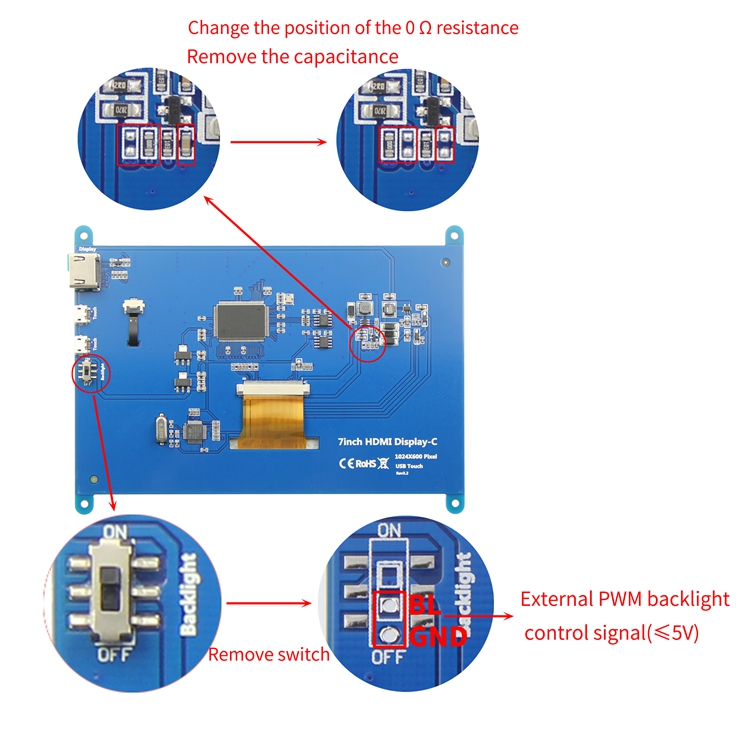
This method is only available for 7-B Rev3.2, 7-C Rev3.3 or above
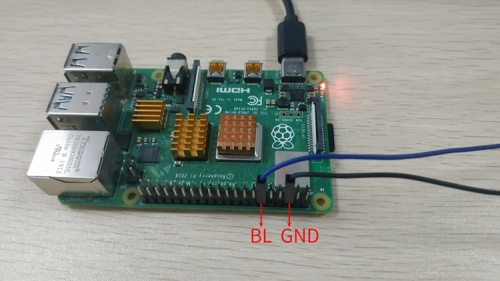
Connect the Raspberry Pi:

In Raspberry Pi 3B/3B+, The backlight brightness can be controlled by following the command:
gpio -g pwm 18 1024
gpio -g mode 18 pwm
gpio pwmc 1000
gpio -g pwm 18 X
(The value of X should be between 0 and 1024, 0 brightest, 1024 darkest)
In Raspberry Pi 4B, you need to update the wiringPi GPIO library (Raspberry Pi needs to connect to the Internet):
cd /tmp
wget https://project-downloads.drogon.net/wiringpi-latest.deb
sudo dpkg -i -B wiringpi-latest.deb
Execute the following command to control the backlight brightness:
gpio -g pwm 18 1024
gpio -g mode 18 pwm
gpio pwmc 1000
gpio -g pwm 18 X
(The value of X should be between 0 and 1024, 0 brightest, 1024 darkest)
