More actions
| (65 intermediate revisions by 3 users not shown) | |||
| Line 32: | Line 32: | ||
|LCD Interface | |LCD Interface | ||
|SPI | |SPI | ||
|- | |||
|Driver IC | |||
|ILI9341 | |||
|- | |- | ||
|Touch Screen Type | |Touch Screen Type | ||
| Line 57: | Line 60: | ||
|84.91*56.54(mm) | |84.91*56.54(mm) | ||
|- | |- | ||
|Weight | |Power Dissipation | ||
| | |0.15A*5V | ||
|- | |||
|Rough Weight(Package containing) | |||
|54 (g) | |||
|} | |} | ||
== <font color="blue"> | == <font color="blue"> Hardware description </font>== | ||
*<font color="blue">Dimensional drawing</font> | |||
[[File:MPI3201-Rpi-0001.jpg|450px]] | |||
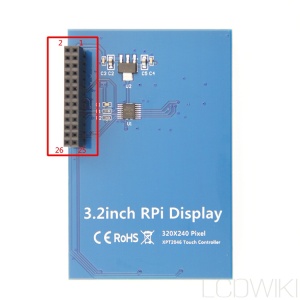
*<font color="blue">Interface</font> | |||
[[File:MPI3201-RPi-901.jpg|300px]] | [[File:MPI3201-RPi-901.jpg|300px]] | ||
{| class="wikitable" border="1" style="width: 50%; background-color: white;" | {| class="wikitable" border="1" style="width: 50%; background-color: white;" | ||
| Line 130: | Line 144: | ||
|} | |} | ||
==<font color="blue">How to use with | ==<font color="blue">How to use with Raspberry Pi OS </font>== | ||
*<font color="blue">Step 1, Install | *<font color="blue">Step 1, Install official image '''Raspberry Pi OS'''</font><br /> | ||
1) Download the latest image from the official download <br /> | 1) Download the latest image from the official download <br /> | ||
https://www.raspberrypi.com/software/operating-systems/ | |||
2) Install the system according to the official tutorial steps.<br /> | 2) Install the system according to the official tutorial steps.<br /> | ||
| Line 141: | Line 155: | ||
*<font color="blue">Step 2, Install the driver for the LCD </font><br /> | *<font color="blue">Step 2, Install the driver for the LCD </font><br /> | ||
1) Connect the 3.2inch RPi Display with the Raspberry Pi and plug it in<br /> | 1) Connect the '''3.2inch RPi Display ''' with the Raspberry Pi and plug it in<br /> | ||
[[File:MPI3201-RPi-900.jpg|300px]] | |||
2) Log into the command line interface for Raspberry Pi(Initial user name: pi, Password: raspberry), | |||
Get the latest drive from GitHub (the raspberry pie needs to connect to the Internet), | 2) Log into the command line interface for Raspberry Pi(Initial user name: pi, Password: raspberry), Get the latest drive from GitHub (the raspberry pie needs to connect to the Internet), Execute the following commands: | ||
Execute the following commands: | |||
{{code|1= | {{code|1= | ||
| Line 158: | Line 171: | ||
After execution, the system will be restarted. If the display and touch are normal, the installation is successful. | After execution, the system will be restarted. If the display and touch are normal, the installation is successful. | ||
== <font color="blue">How to rotate the display direction</font> == | |||
*'''Step 1''',If the driver is not installed, execute the following command (Raspberry Pi needs to connected to the Internet): | |||
{{code| | |||
sudo rm -rf LCD-show | |||
git clone https://github.com/goodtft/LCD-show.git | |||
chmod -R 755 LCD-show | |||
cd LCD-show/ | |||
sudo ./LCD32-show }} | |||
After execution, the driver will be installed. <br/> | |||
*'''Step 2''',If the driver is already installed, execute the following command: | |||
{{code| | |||
cd LCD-show/ | |||
sudo ./rotate.sh 90}} | |||
After execution, the system will automatically restart, and the display screen will rotate 90 degrees to display and touch normally. <br/> | |||
( ' <font color="blue">90</font> ' can be changed to 0, 90, 180 and 270, respectively representing rotation angles of 0 degrees, 90 degrees, 180 degrees, 270 degrees) <br/> | |||
<font color="red">If the '''rotate.sh''' prompt cannot be found, use '''Step 1''' to install the latest drivers</font> | |||
==<font color="blue"> Download Resources</font>== | ==<font color="blue"> Download Resources</font>== | ||
* '''Document''' | * '''Document''' | ||
# [http://www.lcdwiki.com/res/MPI3201/Document/3.2inch_RPi_Display_V1.0.pdf 3.2inch_RPi_Display_V1.0] | |||
# [http://www.lcdwiki.com/res/PublicFile/How_to_install_the_LCD_driver_V1.2.pdf How_to_install_the_LCD_driver_V1.2] | # [http://www.lcdwiki.com/res/PublicFile/How_to_install_the_LCD_driver_V1.2.pdf How_to_install_the_LCD_driver_V1.2] | ||
# [http://www.lcdwiki.com/res/PublicFile/How_to_install_matchbox-keyboard(En).pdf How_to_install_matchbox-keyboard] | # [http://www.lcdwiki.com/res/PublicFile/How_to_install_matchbox-keyboard(En).pdf How_to_install_matchbox-keyboard] | ||
# [http://www.lcdwiki.com/res/PublicFile/How_to_use_Raspberry_Pi(Download,Format,Burn,SSH,PuTTy)-V1.0.pdf How_to_use_Raspberry_Pi(Download,Format,Burn,SSH,PuTTy)-V1.0.pdf] | |||
# [http://www.lcdwiki.com/res/Show_Direction_and_Touch/How_to_calibrate_the_resistance_touch_screen-V1.2.pdf How_to_calibrate_the_resistance_touch_screen-V1.2] | # [http://www.lcdwiki.com/res/Show_Direction_and_Touch/How_to_calibrate_the_resistance_touch_screen-V1.2.pdf How_to_calibrate_the_resistance_touch_screen-V1.2] | ||
# [http://www.lcdwiki.com/res/Show_Direction_and_Touch/How_to_change_display_direction-GPIO-Resistive_Touch-V1.2.pdf How_to_change_display_direction-GPIO-Resistive_Touch-V1.2] | # [http://www.lcdwiki.com/res/Show_Direction_and_Touch/How_to_change_display_direction-GPIO-Resistive_Touch-V1.2.pdf How_to_change_display_direction-GPIO-Resistive_Touch-V1.2] | ||
| Line 174: | Line 207: | ||
:If you have difficulty installing the driver, or if you still can't use the display properly after installing the driver, | :If you have difficulty installing the driver, or if you still can't use the display properly after installing the driver, | ||
:Please Try our Configned images for tested. | :Please Try our Configned images for tested. | ||
:Just need download and write the image into the TF card. DO NOT need any driver installation steps. | :Just need download and write the image into the TF card. '''DO NOT '''need any driver installation steps. | ||
{| class="wikitable" border="1" style="width: | {| class="wikitable" border="1" style="width: 100%; margin-left:1.5%;background-color: white;" | ||
!Image Name | !Image Name | ||
!Version | !Version | ||
| Line 184: | Line 217: | ||
|- | |- | ||
| rowspan="2" |Raspbian | | rowspan="2" |Raspbian | ||
| rowspan="2" | | | rowspan="2" |2023-02-21 | ||
| rowspan="2" |PI3B+/ | | rowspan="2" |PI4/PI3B+/PI3/PI2/ | ||
PI1/ZERO/ZERO W | |||
| rowspan="2" |user:pi | | rowspan="2" |user:pi | ||
password:raspberry | password:raspberry | ||
| | |[[File:Baiduyun.jpg|24px]]BaiduYun: | ||
|[https://pan.baidu.com/s/ | |[https://pan.baidu.com/s/1R8IH6BB85NIRBpEaswv6kw 2.4-2.8-3.2-MPI2418-MPI2801-MPI3201-2023-02-21-raspios-buster-armhf.7z] 提取码:femf | ||
|- | |- | ||
| | |[[File:Mega-1.jpg|24px]]Mega: | ||
| | |[https://mega.nz/folder/nCJzgY5D#OE_sEg0a51nqKOUp8SIKeg 2.4-2.8-3.2-MPI2418-MPI2801-MPI3201-2022-04-04-raspios-buster-armhf.7z] | ||
|- | |- | ||
| rowspan="2" |Ubuntu | | rowspan="2" |Ubuntu-MATE-32bit | ||
| rowspan="2" | | | rowspan="2" |22.04 | ||
| rowspan="2" |PI3,PI2 | | rowspan="2" |PI4,PI3B+,PI3,PI2 | ||
| rowspan="2" |user:pi | | rowspan="2" |user:pi | ||
password:raspberry | password:raspberry | ||
| | |[[File:Baiduyun.jpg|24px]]BaiduYun: | ||
| | |[https://pan.baidu.com/s/1cDgLRZj0KfH-wz4cIx2KVA MPI2418-MPI2801-MPI3201-2.4-2.8-3.2inch-ubuntu-mate-22.04-desktop-armhf+raspi.7z] 提取码:mfl3 | ||
|- | |- | ||
| | |[[File:Mega-1.jpg|24px]]Mega: | ||
| | |[https://mega.nz/folder/SehgkCJa#J1T2P22Mw0Z8DJw55DNieA MPI2418-MPI2801-MPI3201-2.4-2.8-3.2inch-ubuntu-mate-22.04-desktop-armhf+raspi.7z] | ||
|- | |- | ||
| rowspan="2" |Kali | | rowspan="2" |Kali Linux RaspberryPi | ||
| rowspan="2" | | | rowspan="2" |2023.1 | ||
| rowspan="2" |PI3B+,PI3,PI2 | | rowspan="2" |PI4B,PI3B+,PI3,PI2 | ||
| rowspan="2" |user: | | rowspan="2" |user: kali | ||
password: | password: kali | ||
| | |[[File:Baiduyun.jpg|24px]]BaiduYun: | ||
| | |[https://pan.baidu.com/s/1RQn9E3-a5bKDHXVkcsODJQ MPI2418-MPI2801-MPI3201-2.4-2.8-3.2inch-kali-linux-2023.1] 提取码:7a1q | ||
|- | |- | ||
| | |[[File:Mega-1.jpg|24px]]Mega: | ||
| | |[https://mega.nz/folder/DOpCUI5Z#uF4QQ8EY3Cj71R19ECKiXQ MPI2418-MPI2801-MPI3201-2.4-2.8-3.2inch-kali-linux-2022.1] | ||
|} | |} | ||
Latest revision as of 17:26, 27 March 2023
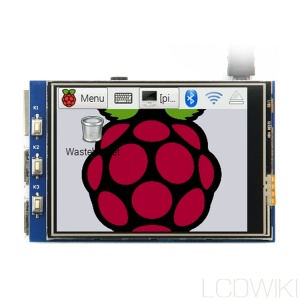
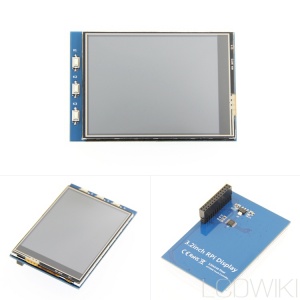
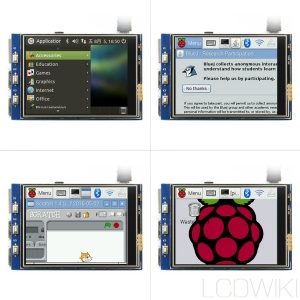
Product pictures
Features
- 320×240 resolution
- Resistive touch control
- Supports any revision of Raspberry Pi (directly-pluggable)
- Compatible with Raspberry Pi A, B, A+, B+, 2B, 3B, 3B+versions
- Drivers provided (works with your own Raspbian/Ubuntu directly)
- Size perfectly fits the Raspberry Pi
- High quality immersion gold surface plating
- Supports Raspbian system, Ubuntu system ,Kali Linux system
Key Parameters
| SKU | MPI3201 |
| LCD Type | TFT |
| LCD Interface | SPI |
| Driver IC | ILI9341 |
| Touch Screen Type | Resistive |
| Touch Screen Controller | XPT2046 |
| Colors | 65536 |
| Backlight | LED |
| Resolution | 320*240 (Pixel) |
| Aspect Ratio | 8:5 |
| Active Area | 48.6*64.8(mm) |
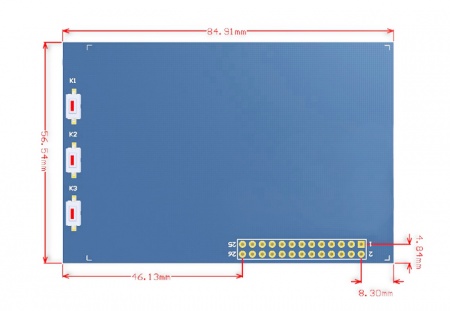
| Dimensions | 84.91*56.54(mm) |
| Power Dissipation | 0.15A*5V |
| Rough Weight(Package containing) | 54 (g) |
Hardware description
- Dimensional drawing
- Interface
| PIN NO. | SYMBOL | DESCRIPTION |
|---|---|---|
| 1, 17 | 3.3V | Power positive (3.3V power input) |
| 2, 4 | 5V | Power positive (5V power input) |
| 3, 5, 7, 8, 10, 22 | NC | NC |
| 6, 9, 14, 20, 25 | GND | Ground |
| 11 | TP_IRQ | Touch Panel interrupt, low level while the Touch Panel detects touching |
| 12 | KEY1 | Key |
| 13 | RST | Reset |
| 15 | LCD_RS | LCD instruction control, Instruction/Data Register selection |
| 16 | KEY2 | KEY |
| 18 | KEY3 | KEY |
| 19 | LCD_SI / TP_SI | SPI data input of LCD/Touch Panel |
| 21 | TP_SO | SPI data output of Touch Panel |
| 23 | LCD_SCK / TP_SCK | SPI clock of LCD/Touch Panel |
| 24 | LCD_CS | LCD chip selection, low active |
| 26 | TP_CS | Touch Panel chip selection, low active |
How to use with Raspberry Pi OS
- Step 1, Install official image Raspberry Pi OS
1) Download the latest image from the official download
https://www.raspberrypi.com/software/operating-systems/
2) Install the system according to the official tutorial steps.
- Step 2, Install the driver for the LCD
1) Connect the 3.2inch RPi Display with the Raspberry Pi and plug it in
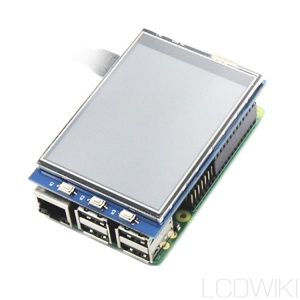
2) Log into the command line interface for Raspberry Pi(Initial user name: pi, Password: raspberry), Get the latest drive from GitHub (the raspberry pie needs to connect to the Internet), Execute the following commands:
sudo rm -rf LCD-show
git clone https://github.com/goodtft/LCD-show.git
chmod -R 755 LCD-show
cd LCD-show/
sudo ./LCD32-show
After execution, the system will be restarted. If the display and touch are normal, the installation is successful.
How to rotate the display direction
- Step 1,If the driver is not installed, execute the following command (Raspberry Pi needs to connected to the Internet):
sudo rm -rf LCD-show
git clone https://github.com/goodtft/LCD-show.git
chmod -R 755 LCD-show
cd LCD-show/
sudo ./LCD32-show
After execution, the driver will be installed.
- Step 2,If the driver is already installed, execute the following command:
cd LCD-show/
sudo ./rotate.sh 90
After execution, the system will automatically restart, and the display screen will rotate 90 degrees to display and touch normally.
( ' 90 ' can be changed to 0, 90, 180 and 270, respectively representing rotation angles of 0 degrees, 90 degrees, 180 degrees, 270 degrees)
If the rotate.sh prompt cannot be found, use Step 1 to install the latest drivers
Download Resources
- Document
- 3.2inch_RPi_Display_V1.0
- How_to_install_the_LCD_driver_V1.2
- How_to_install_matchbox-keyboard
- How_to_use_Raspberry_Pi(Download,Format,Burn,SSH,PuTTy)-V1.0.pdf
- How_to_calibrate_the_resistance_touch_screen-V1.2
- How_to_change_display_direction-GPIO-Resistive_Touch-V1.2
- Driver download
- download:LCD-show.tar.gz
- Images download
- If you have difficulty installing the driver, or if you still can't use the display properly after installing the driver,
- Please Try our Configned images for tested.
- Just need download and write the image into the TF card. DO NOT need any driver installation steps.
| Image Name | Version | Support | Password | Download | |
|---|---|---|---|---|---|
| Raspbian | 2023-02-21 | PI4/PI3B+/PI3/PI2/
PI1/ZERO/ZERO W |
user:pi
password:raspberry |
2.4-2.8-3.2-MPI2418-MPI2801-MPI3201-2023-02-21-raspios-buster-armhf.7z 提取码:femf | |
| 2.4-2.8-3.2-MPI2418-MPI2801-MPI3201-2022-04-04-raspios-buster-armhf.7z | |||||
| Ubuntu-MATE-32bit | 22.04 | PI4,PI3B+,PI3,PI2 | user:pi
password:raspberry |
MPI2418-MPI2801-MPI3201-2.4-2.8-3.2inch-ubuntu-mate-22.04-desktop-armhf+raspi.7z 提取码:mfl3 | |
| MPI2418-MPI2801-MPI3201-2.4-2.8-3.2inch-ubuntu-mate-22.04-desktop-armhf+raspi.7z | |||||
| Kali Linux RaspberryPi | 2023.1 | PI4B,PI3B+,PI3,PI2 | user: kali
password: kali |
MPI2418-MPI2801-MPI3201-2.4-2.8-3.2inch-kali-linux-2023.1 提取码:7a1q | |
| MPI2418-MPI2801-MPI3201-2.4-2.8-3.2inch-kali-linux-2022.1 | |||||
- Software

